Thursday, August 1, 2013

Happy Lughnasadh & Recipe!

Happy Lughnasadh Everyone!


 Also known as Lammastide in England, Lùnastal in Scotland, or Calan Awst in Wales, (now all of GB gets it off for bank holiday anyway ;) it's the yearly celebration of the summer harvest! Yay! Fun with summery food! Think the first corn and barley harvest, lots of bilberries, bonfires, hand marriages, (Lasted a year and a day. Can we bring those back please?), & feasting :) Not an abundance of bilberries to be found in Brooklyn, but seemingly the blueberry has been named honorary berry for the N. Eastern US, while the blackberry is celebrated over on the Pacific Northwest. (I bought some of each. I have a hard time saying NO to berries...) I also read that my ancestors over in Scotland baked something called a lunastain bannock, which was a cake (well sort of...) A lot of the super old school recipes seemed to
be oaten griddle cakes made with lard...But the newer interpretations were just shortbread recipes with candied fruit and nuts added... So I attempted to harmonize the two opposing ideas with an oaten loaf. Made with fresh fruit and spices. Don't expect a cake cake. Much like an old school griddle cake or a short bread it doesn't rise significantly, is denser, and isn't particularly sweet. Hence I imagine why more recent bakers put in all the candied substances. But it seemed unlikely that a version so sweetened would be any kind of historical representation. So, I stuck to a non sweet oat cake and ate paired with the fresh berries and some whipped coconut cream, (1 can coconut cream, solids only. I added a spoonful of yogurt, a pinch of cardamom, and 1/2 tsp honey for a creme fresh consistency.)  It's meant to be broken rather than sliced :) The one note I have is that if you're starting with dry oats, use oat bran or old fashioned oats or quick oats. You could use steel cut, but might want to cook the oatmeal first and cool it, then start mixing in your dry goods to your oatmeal mush. Not sure raw steel cut oats would bake properly as they need quite a bit of water. You can also try this with corn flour or barley flour if you want as some sources I read referred to grinding freshly harvested corn or barley by hand and then forming into the loaf for the holiday.

Lunastain Bannock 
1 1/2 cup oats 1/2 cup flour (I used brown rice flour)
1/4 cup ghee/butter/coconut oil + 1/2 cup hot water
2 tbsp honey or maple syrup (I used 1 tbsp maple syrup and 1/2 tsp monk fruit "in the raw".)
handful chopped nuts
I small chopped fruit (about 1/3 cup I used a fresh apricot from market)
1/2 tsp xanthan gum
pinch of salt
large pinch of soda
spice blend: 1/8 tsp cinnamon, 1/8 tsp nutmeg, 1/2 tsp ginger, 1/8 tsp cloves.


Set oven to 325F Grease a baking sheet. Sift the dry ingredients into a bowl. Add the wets and rub in to form a dough. Add the nuts and fruit, making sure they are evenly distributed. Form into a 6" round on a lightly floured surface and prick all over with a fork. Place on the sheet and bake for about 40-45 min. Allow to cool before breaking and eating :)


BKBTY

Wednesday, July 31, 2013

Brow Beaten...

Brow Shaping 101

I've had a couple friends and family members ask me about brow shaping, how to do it, where to go, what method to recommend. So I thought I'd do an entry dedicated to those fuzzy face framers and all important glam radiators, eyebrows. The first question I'll address is method. I'm a tweezer girl. I like the control, I like how non abrasive it is to the skin, I like that you don't have to wait for hairs to grow to a certain length before you can be able to remove them. It also puts the power of your brows in your own hands which is nice. 
I can't speak to threading. It's something I have little experience with. It seems as though the general consensus is that it's gentle and extremely thorough so awesome on both counts. It does mean you must rely on someone else. A makeup client of mine recently was bemoaning the relocation of her threading parlor and how it meant she had to find somewhere else, or travel quite a long way while in the mean time she felt her brows were getting unruly. Slight setback but 4.5 out of 5 stars really. 
The two methods I cannot professionally or personally recommend are waxing or sugaring. And I say this as someone who was a salon brow waxer. It's rough on that oh so thin and delicate skin, and it's aggressive to the hair follicle. There's also far less control. I was taught by an excellent waxer, a really safe technique, and I still felt at the end I needed switch over to the tweezers because it was impossible to attend to certain sections of the brow with wax and not remove WAY too much hair. Waxing is a good method on areas where you want total hair removal of a larger space. The unibrow area is the most lenient I'm gonna get on this one. Otherwise, please avoid it. It can cause skin irritation, burns, ingrowns, follicle damage, and my personal pet peeve, skinny brows. Over waxed brows are...unflattering. I'll leave it at that.
--I thought perhaps this was my own personal "issue" to deal with, but about a year ago I was fortunate enough to hear the great Joey Mills (the creator of the strong brow) speak about brow shaping, and he was ADAMANT that tweezing was the method best for brow care, and that waxing was akin to brow evil... 

Where to go. Well that's a toughie because salons really like the wax now don't they...So I say if you find a threader you love, stick with that, but they're so many, it's a bit of a crapshoot. Makeup artists can really be your saviors here because you can either have them shape for you, or give you a tutorial on shaping (like I'm doing right now! TADA!)

So let's move on to how to do the shaping. What you'll need. 

1. A nice pair of tweezers. My all time fav shape for brows is the revlon "splinter" shape (grocery stores, drug stores, Target.) I have a pair of the "pro" shape in my mani-pedi tool kit but I have to say I still like the splinter shape best. I think they grip and pick up easier. The inside ridges or "treads" can wear out with time. Then they stop gripping and you'll need to get a new pair, but seriously I think my pair lasted like a good ten years before that happened so they'll last a long time. 

2. A pair of small scissors. Nail scissors should do it if you want a pair dedicated to brows instead. 

3. A disposable mascara wand. (Ricky's/Sally Beauty.) 

4. If you're in any way unsure about what shape you want - white pencil eyeliner. Doesn't need to be MAC quality. Can be Cover Girl or Wet & Wild (I'll explain in a bit.)

5. Brow pencil or powder. If you have one you already like, use it. I always tell clients to stick to blond. Weird huh? Unless you want to have a Groucho Marks thing going on, blond pencil or powder is the way to go. It fills in without washing you out. I have VERY dark hair naturally, almost black, perhaps the last stop in Brown City before Blacktropolis. And I always use blond or else it looks scary and weird. I like the Bobbi Brown Brow Kit, but it is expensive, so I'll also say try the Milani in Taupe

6. Clear mascara. Maybelline makes a great one.

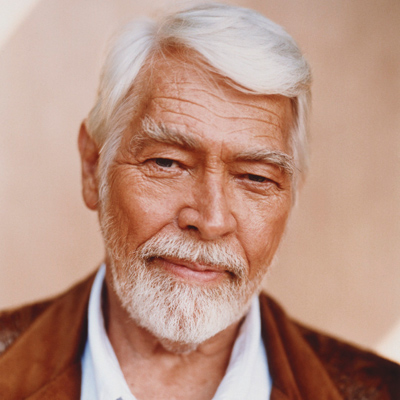
Ok so now that you've assembled the necessary implements let's go ahead and wash your hands & face so that they're nice and clean. Next, take the mascara wand and brush your brows up. Yup, all the way up so that you look like James Coburn in his later years. Now one brow at a time take the wand and brushing through the brow hold the brush in the brow so that edge of the brush is in line with the top edge of the brow and with your scissors snip in a straight line any hairs that grow past the top edge of the wand. Continue for entire brow. Now, brush your brows downward. Yup, all the way down, and one brow at a time line the bottom edge of the wand with the bottom edge of the brow and with your scissors, snip in a straight line any hairs that grow past the bottom edge of the wand. 

 ** A word about hormonal thinning. If you've got sparse brows due to natural changes in your body, or thyroid medication, or other hormonal fluctuations feel free to modify this step to meet your needs. Due to my hormone issues and genetics I have quite sparse brows and, were I to follow the above procedure I would have very little left. I can say that no man or woman I've attended to ever had this problem and I trimmed them all normally, and it looked great. But if you know you need the "longies" to help fill in areas, just brush your brows upwards and outwards and trim any unruly guys that refuse to lie nicely in line.**

Next step. Refer to a pic like this.
Go ahead and use your mascara wand as a ruler or grab a nail file, makeup brush, anything nice and straight. Line the wand up with the inside corner of your eye and holding it straight take the white eyeliner and make a vertical line in your brow. This is where your brow should start. Do the same for the other brow. Everything in between can go my friend. You can go ahead and pluck those. If you want a very full brow, think young brooke shields, you can move the wand over by one width of the wand and start from there but no more. Unibrows = defeating the purpose of your efforts here today.

Outside: Use the corner of the nose and create a line with the wand that goes to the outside corner of the eye. Continue to follow that same line to the brow. Make a line with the white eyeliner. This is the end of the brow. Anything that extends past this line can be plucked. Conversely if your brow doesn't make it to that line fill to that point when we reach the filling section of this lesson. Do the same for the other brow.


Take the wand and hold it vertically at the outside of the iris. (the part with color.) Holding the wand straight make a line in your brow with the white eyeliner. Repeat on other side.

Now take the wand and create a line from the tip of your nose through the center of the pupil. (the black part.) Continue that line til it meets the brow. Make a line with the white eyeliner. Repeat on other side.

You should be noticing that those two marks are nearly on top of each other yes? Good. You have just located your natural arch!

Hold the wand horizontally straight across from the bottom of the inside corner of the brow to the outside corner and make a horizonatal line with the eyliner. Pluck anything growing below the line. (see line B.)

Things should already be looking much tidier. The next step is, well kinda more up to you and your brows. For very natural brows, merely remove anything straggly or hanging out on it's own, don't forget above the brow and outer temple region, stragglers live there too.

For a more manicured look, use the arch guide line you've just made and the horizontal line. measure a little under a centimeter from the horizontal line upwards. Make a dot with the eyeliner. This is about where the bottom of your arch should be, though it might be slightly more or less depending on your specific brows. This is why the liner comes in handy. If something looks not quite right, use a little makeup remover and try again.


Use the wand and create another vertical line at the outside of the iris (the part with color) on the INSIDE half of the eye. ( closer to your nose.) Make another eyeliner line. This is about where you should start to taper the brow. You should be able to "connect the dots" so to speak from the bottom of  this new line to the previous bottom of the arch dot. If you do in fact create a line, remove everything below it.

Use the bottom of the outside corner line and the arch dot, along with the horizontal line to show you where to remove hair from the corner to end of the brow.


Phew ok give it a once over in case you missed anyone and then use a mild makeup remover like witch hazel to remove all that white liner!

From here, Take your powder or brow pencil and fill in any sparse patches. use small light hair like strokes with a pencil or light coverage with the powder, the aim is to have it blend in with the brow rather than stand out.

Finally take the clear mascara and with the wand --or another disposable (keeps the mascara cleaner) brush the brows gently upward and outward and voila! You should have proportional flattering brows. As you become more comfortable with this, you can personalize the shape a little more but be warned. Every few hairs take a step back and look. Make sure you take your whole face into consideration. Brows are meant to frame that pretty picture so don't make them disappear into Pamela Anderson land!!!!

Some great browsperation.....

BKBTY

Monday, July 29, 2013

Recipe: Saag Kukuramuttā

Creamed Spinach and Mushrooms!


Probably because I'm the lamest person you could ever meet, a few years ago I gave myself the moniker of "Popeye" due to my tendency to become extremely ill tempered if I can't have spinach every day. (I really, really like spinach.) So some of my favorite dishes to order/make/CONSUME contain this green vitamin packed ambrosia. Saag Paneer is a DELICIOUS Indian dish that could be compared to creamed spinach in western cuisine. I found a great recipe for it from Aarti Sequeria, but in my usual sensitive tummy fashion, was a bit uncertain about eating that much cheese.... So I decided to try mushrooms given their similarly springy mouth feel and somewhat creamy flavor. (also who doesn't love spinach & mushrooms. One of my all time favorite combos ever.) I used plain old white button and, don't get me wrong, they are great for this, but I also think King Oyster aka French Trumpets would be REALLY good, the market was just out of them today (next time.) You'll also notice my usual slight alterations as regards oil and salt proportions... If you want to, def try with the paneer, I think if I were making this for a party or potluck, I would use cheese, especially one as easy to make as paneer, but for a dish that I'll eat with my lunch all week, mushrooms were the better option = happier me in the long run. Conversely if you're vegan, stick with the mushrooms and try a plain coconut yogurt added at the end and this dish becomes totally vegan. Easy peasy.

Ingredients:
1 tsp ground turmeric
1/8 tsp cayenne pepper
1/2 tsp salt (+ a bit to taste)
2 tbsp plus 1 tbsp organic unrefined coconut oil
10-12 oz mushrooms quartered and then halved (the closest to a cube shape you can get) 
1 (16-ounce package) organic frozen chopped spinach
1 medium white onion, minced
1 1/2" ginger, peeled and minced
4 cloves garlic, minced
1  serrano chile, seeded, minced
1/2 tsp garam masala*
2 tsp ground coriander
1 tsp ground cumin
1/2 cup plain organic yogurt, whisked smooth
1/2 cup water (have more handy during cooking if needed)

Directions:
Note: This recipe gets worlds easier and faster if you have a food processor. As the consistency is mushy, not having to mince by hand is a gigantic time saver. Also if your mushrooms have been in the fridge bring them to room temp first, otherwise they'll harden the oil and won't marinate properly.

1. Chop mushrooms, set aside. In a large bowl mix turmeric, cayenne, and 2 tbsp melted oil. Then stir in the mushrooms evenly coating them, and set all aside to marinate. 

2. Prep work time. Get out your food processor and two large bowls. Into one bowl put frozen spinach and microwave until thawed. About 3-5 min depending on how strong your microwave is. Then empty into food processor and mince.  Pour back into bowl and set aside.

3. Rough chop onion into processor friendly chunks, mince in processor. Empty into second bowl. Set aside.

4. Peel garlic and ginger, seed chile. Food process. Put in same bowl as onion. (If you have a nice big food processor go ahead and combine 3 & 4.)

5. In a tiny bowl or cup mix cumin, garam masala, and coriander. Set aside.

6. Get out a large sauté pan and over medium heat pour your mushrooms. Spread them evenly so that they're only a single layer deep and cook 2 min. Toss and continue to cook 2 min on other side. Remove from pan and set on plate. 

7. Melt 1 tbsp coconut oil in the hot pan and then add onion, garlic, and chile mixture. Slow sauté over medium heat for about 15 min. Stir occasionally so that it cooks evenly but doesn't scorch. Look for a buttery toffee color to form but not brown. Add a bit of water if needs be to keep from scorching. Should smell like cooked onions and garlic rather than raw when they're finished.

8. Add premixed spices and a little water if you haven't yet. Cook for 3-5 min just until the spices have opened and unified in flavor. 

9. Add Spinach, half cup water, and a bit more salt to taste. Mix thoroughly with spice/onion base. Cook for another 3-5 min.

10. Remove from heat. Slowly mix in yogurt. Then, with a slotted spoon, add mushrooms into spinach mixture. --The key here is not to get a ton of the mushroom broth that these delicious fungi have been releasing while you've been cooking. It makes our finished dish a bit too runny. You may feel free to hold onto it however. It is extremely yummy. I'm gonna use mine like a sauce for my steamed veggies tonight. ;) 

11. Return to medium heat and cover. Cook for another 5 min. 
ENJOY!
*Garam Masala
1 tbsp ground cloves
1 tbsp ground cinnamon
2 tsp ground cardamom
1 tsp fine ground black pepper
good pinch ground cumin


BKBTY


Sunday, July 28, 2013

Primer Time

Beat the Shine....


No not the sunshine! Love me some vitamin D! But if you're like me, summer can also amp up the shine on that T-Zone in the middle of yo face! Now on a day to day this may not be too big a deal but it can get irritating if you've got a wedding to attend, or neighborhood festival, or charity function and the paparazzi won't stop snapping your glamourous visage. No one likes being the shiny face in the group shot. It's right up there with being the red-eyed person... :( boo. Fortunately there's a fix for this, and it tends to come in small tube at makeup stores! It's called primer, and it does more than just get your face ready for more makeup. A good primer can really be worn without putting foundation on top. It can be used just to control oil slicks and help keep you looking fresh as the day wears on. Or if you know you have problems with makeup staying put throughout the day this could be your salvation. Start with clean, toned, moisturized skin and then apply a pea sized amount of primer to your T-Zone, or if you have problems with eye makeup or lipstick staying put, do just the eyes or lips. You can just rub it in with your fingers (or a sponge or brush) like you did with
your lotion and that's it! The only down side of primer is that the very nature of the beast is to "stop them pores up" (said the tiny sea captain who helps steer you in life...) Sadly even the nice pricy "noncodmegenic" claiming ones are clogging. So I wouldn't necessarily every day with these guys, if you're prone to breaking out (which if you're super oily like me, you might be.) They come in a wide variety of price and performance levels.  For the purpose of this blog I'll address four of them.
 The first is the least expensive and can in fact be found in the drug store/ supermarket world.  It's the L'Oreal, Studio Secrets Professional Magic Perfecting Base Primer. It's thick, I mean really thick. The least skin care friendly of all the ones I'm writing about today but it does have it's place. If you're a professional like me, this is the best to have in your kit for low paying jobs ($9.99 per half oz.) My moto, -never spend more on a job than you're getting paid! -strikes again, but it's true. For those free lunch/a great experience gigs, this is the primer to use. Helps keep down shine and keep that makeup in place. For personal use, I say love yourself more than this and spend a
little more than this.
The second conversely is the nicest and priciest: Smashbox Photo Finish Foundation Primer. You can find this baby at Sephora. This is the long time favorite of pros everywhere and has formulations for fine line correction, SPF, yellow undertone corrector, the list goes on. It's $38.00 - $42.00 per oz of this stuff so on the pricier side but so smooth and fine, a little goes a long way. If I made a smidge more $$ this would be my pick.
Which brings us to our next product, Too Faced Primed & Poreless Skin Smoothing Face Primer. The primer I use on myself, (I actually need to buy more of this stuff soon and want to try the "pure formulation" for oily/sensitive skin...) Comes out looking flesh toned but disappears on the skin, aka won't look like you're wearing foundation. This one's a bit less pricy. $30 per oz and they also have an eye one that's $20 if you just need eye primer. It's also a touch thicker than the Smashbox but still very velvety and has Retinol and Vitamins A&C. Also a Sephora find. See if you can nab the free gift size tube at checkout, great way to try it :)
The last one is DHC's Velvet Skin Coat. The other two ladies in my family really adore this product so I'll include it ;) It's slightly less expensive- $22.50 (per half oz) but only available through
DHC, so add S&H onto that. It has an olive oil base to keep skin hydrated and silky but one drawback is that you're not supposed to use it on your lips, so not the choice if you're looking to keep lip color in place. But a great option for oil control.
 Next time you need to go publicing all day in the heat, try a primer and see if it's been the missing link!
BKBTY

I'm Hooked and I can't Stop Starin'

Suspiria Pink!
Ok so I may have bought more than one nail laquer at OCC when I went in for "Black Dahlia" for my wedding self pedi. The second hue I bought for bright summer wear is called "Suspiria" and is another shade from their latest "Psychological Thriller" collection. Named after the 1977 Italian flick about witches teaching at a ballet academy (um, AWESOME.) It's described as an opaque bright UV

magenta but that doesn't quite seem to do it justice. I put it on my toesies a couple days ago and nearly tripped walking outside they looked so bright and pretty!!! It's the shade of pinky purple often traditionally captured in Saree or lipsticks during the late 80's, except it's not frosted. So pretty. Highly recommending this one before the new line comes out and this one disappears....
BKBTY


Saturday, July 27, 2013

Rants and Reviews: Mary's Gone Crackers

Mary's Made me go Snackers....

Or at least that's what they should be called because put some in front of me and I can't seem to stop eating them... They're organic, gluten free, vegan, and made with ancient grains like quinoa, millet, brown rice, flax, chia, and sesame. I first tried them a couple years ago at the NYC Green Festival but 
had sadly had forgotten about them until my sister recently brought some to the 4th of July BBQ and pool fest I attended and I was reminded of their deliciousness! Unlike impostor health foods they don't cram these crackery snacks full of sugar and hydrogenated oils in place of flavor. They do have some salt but not crazy bad, pretty moderate really as far as sodium intake goes. (differs for each specific product.) I've had the pretzel rods in chipotle tomato (though I'd LOVE to try the curry, YOM.) And I've tried both the original and black pepper crackers-- also delicious. I haven't tried the cookies yet though I'd be willing to try a couple. 9 grams of sugar per 2 cookies is a little higher than I like to do, but again not bad at all. Definitely a better option than Chips Ahoy if
you know you need a cookie fix now and again.  (Though I do really love the Trader Joe's organic animal crackers) They definitely carry these puppies at Whole Foods and Wegman's and are spreading to a number of smaller stores. (Try the prospect park area for BK-ers.) Happy snacking!
BKBTY

Friday, July 26, 2013

Tastes of the Season!

Fun with Markets and Indoor Gardening :)

 Some fun pics of more trips to my delightful little farmers market and my attempts at indoor food growing. Sadly many of my plants have been having trouble dealing with the intense heat of NYC summers and my apt is just the worst when it comes to that too. But some of my weenie tomato plants are still kickin' it so I've re-potted them into a larger container (stoop find!) and am hopeful they'll continue to grow. It's so warm and sunny in here maybe I'll just get fruit in October (just let me think that, ok?) I also re-potted some of my beets and a couple of the leaves broke off, so I of course topped my steamed veggies with them for dinner. OH MY WORD. Some of the sweetest, most delightful greens to enter my mouth. I now feel spoiled for anything other than fresh picked from a window box. As my old English teacher would say Deeeeeeeeeee-lightful! Looking forward to my excursion tomorrow to see what new produce has come in!
BKBTY